In this post we will learn how to add a SQLite database to an ASP.NET core project using Entity Framework core, code-first.
YouTube walkthrough
If you would like, you can watch the walkthrough on YouTube:
Introduction
Sometimes it is helpful to use a local database while developing and while you could load up a local Sql Server database, SQLite is a very lightweight option and makes it easy for other developers to clone your repository and get up and running right away.
Walkthrough
First, let's add some nuget packages. Start by launching "manage nuget packages" window and add Microsoft.EntityFrameworkCore.Design.

Next, add Microsoft.EntityFrameworkCore.Sqlite.

Check to be sure that we have actually added those dependencies:

We have .Design and .Sqlite packages added.
Add a new folder to contain all the data items, then add a new class AppUser.cs

Here is the code for the class:
public class AppUser
{
    public int UserId { get; set; }
    public string Provider { get; set; }
    public string NameIdentifier { get; set; }
    public string Username { get; set; }
    public string Password { get; set; }
    public string Email { get; set; }
    public string Firstname { get; set; }
    public string Lastname { get; set; }
    public string Mobile { get; set; }
    public string Roles { get; set; }
    public List<string> RoleList
    {
        get
        {
            return Roles?.Split(',').ToList()??new List<string>();
        }
    }
}
This class has some basic fields in it: UserId, Provider, NameIdentifier, Username, etc. It also contains a string for roles which will hold a comma-delimited list of strings.
There is one more property for RoleList. It will convert a comma-delimited list of roles for a user and split them into a list of strings.
Let's add another class. We need to add an AuthDbContext which will inherit from the DbContext in Entity Framework.
public class AuthDbContext:DbContext
{
    public DbSet<AppUser> AppUsers { get; set; }
    public AuthDbContext(DbContextOptions<AuthDbContext> options) : base(options)
    {
    }

    protected override void OnModelCreating(ModelBuilder modelBuilder)
    {
        modelBuilder.Entity<AppUser>(entity =>
        {
            entity.HasKey(e => e.UserId);
            entity.Property(e => e.UserId);
            entity.Property(e => e.Provider).HasMaxLength(250);
            entity.Property(e => e.NameIdentifier).HasMaxLength(500);
            entity.Property(e => e.Username).HasMaxLength(250);
            entity.Property(e => e.Password).HasMaxLength(250);
            entity.Property(e => e.Email).HasMaxLength(250);
            entity.Property(e => e.Firstname).HasMaxLength(250);
            entity.Property(e => e.Lastname).HasMaxLength(250);
            entity.Property(e => e.Mobile).HasMaxLength(250);
            entity.Property(e => e.Roles).HasMaxLength(1000);

            entity.HasData(new AppUser
            {
                Provider = "Cookies",
                UserId = 1,
                Email = "bob@admonex.com",
                Username = "bob",
                Password = "pizza",
                Firstname = "Bob",
                Lastname = "Tester",
                Mobile = "800-555-1212",
                Roles = "Admin"
            });

        });
    }
}
This simple class contains one DbSet<AppUser>, a constructor forAuthDbContext and an OnModelCreating where the modelBuilder.Entity for AppUser defines all of the properties and sets attributes such as the primary key, max length and others.
Finally, Entity.HasData provides 'seed' data, or an initial record in our database.
In the seed data, we define "bob tester" user and assign the role of Admin.
We need to go to the appsettings.json and add a connection string for our database. The connection string definition in our case is the DefaultConnection entry as listed below:
"ConnectionStrings": {
    "DefaultConnection": "DataSource=Database\\app.db"
},
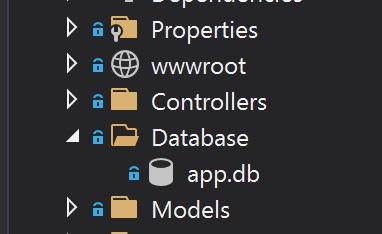
Constructed this way, Entity Framework will add an app.db (sqlite) file in the data folder.
You will see there are two methods; Up and Down for creation and a destruction of our database. During the creation an AppUsers table will be added to the database with a primary key of UserId using an Autoincrement value from Sqlite. Notice also that the migrationBuilder.InserData() command will insert our seed data into our newly created table.
Finally, we want to apply this migration to our database by running the following command in the package manager console:
dotnet ef database update
The first time we run this command, it will create the app.db file and add it to our Database folder. If you want to inspect the contents of this database, you can download a tool called DB Browser for SQLite
To use it from Visual Studio, right click the app.db file in Solution Explorer and select Open With.

It will give you a dialog to let you select which program you want to use to open this file. Click the Add button then click the ... button to browser to the location of your DB Browser for SQLite.exe file. Mine installed into this location:
"C:\Program Files\DB Browser for SQLite\DB Browser for SQLite.exe"
Click OK to complete and I would Set as Default. Now go ahead and open it with our new tool.

You will see a couple of different tables that it created, one for AppUser and one for __EFMigrationsHistory. In our AppUsers table you'll see that we already have a record in there from our seed data bob tester for our bob tester user.
That is all it takes to add and connect a sqlite database to an ASP.NET Core project with EF Core code-first!