
Applications often need to store secrets, such as client_id and client_secret for OAuth connections or database connection strings. In the old days, it was not uncommon to store these secrets in the code and compile them as hard coded values. Today, this practice is less desirable and external configuration settings that can be changed without requiring a recompile of an application is much preferred. However, this new capability comes with a new set of responsibilities.
In this article, we will learn about a few different ways to secure our secrets and make them configurable by environment for our applications. It is a best practice to avoid checking in our secrets to source control where they may be inadvertantly (or intentionally) leaked.
Create a sample web application
We will use Visual Studio to create a sample web application to demonstrate how to store application secrets.
- Open Visual Studio

- Click "Create a new project"

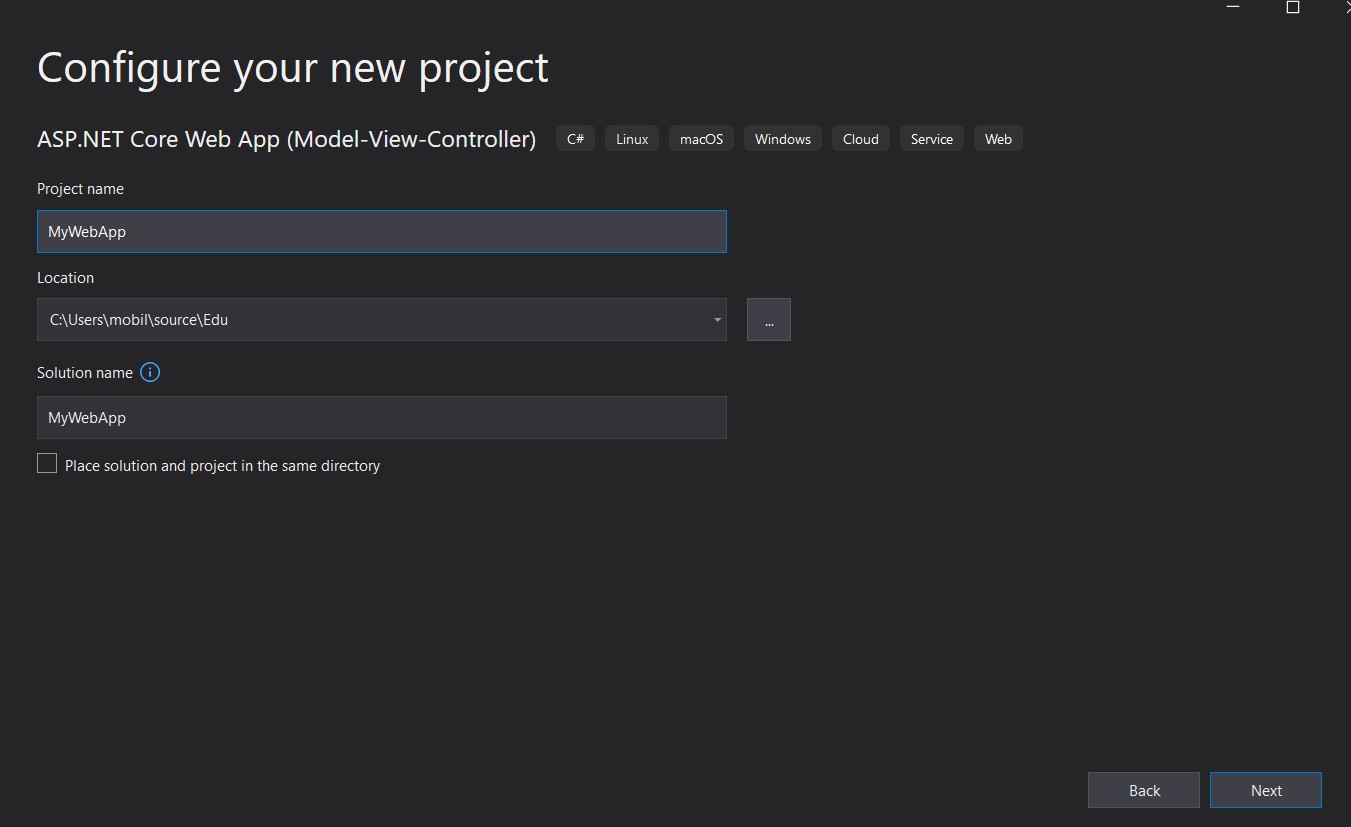
Select C# ASP.NET Core Web App (Model-View-Controller) project type
Select a location to create the project and give it a name. I named mine "MyWebApp".
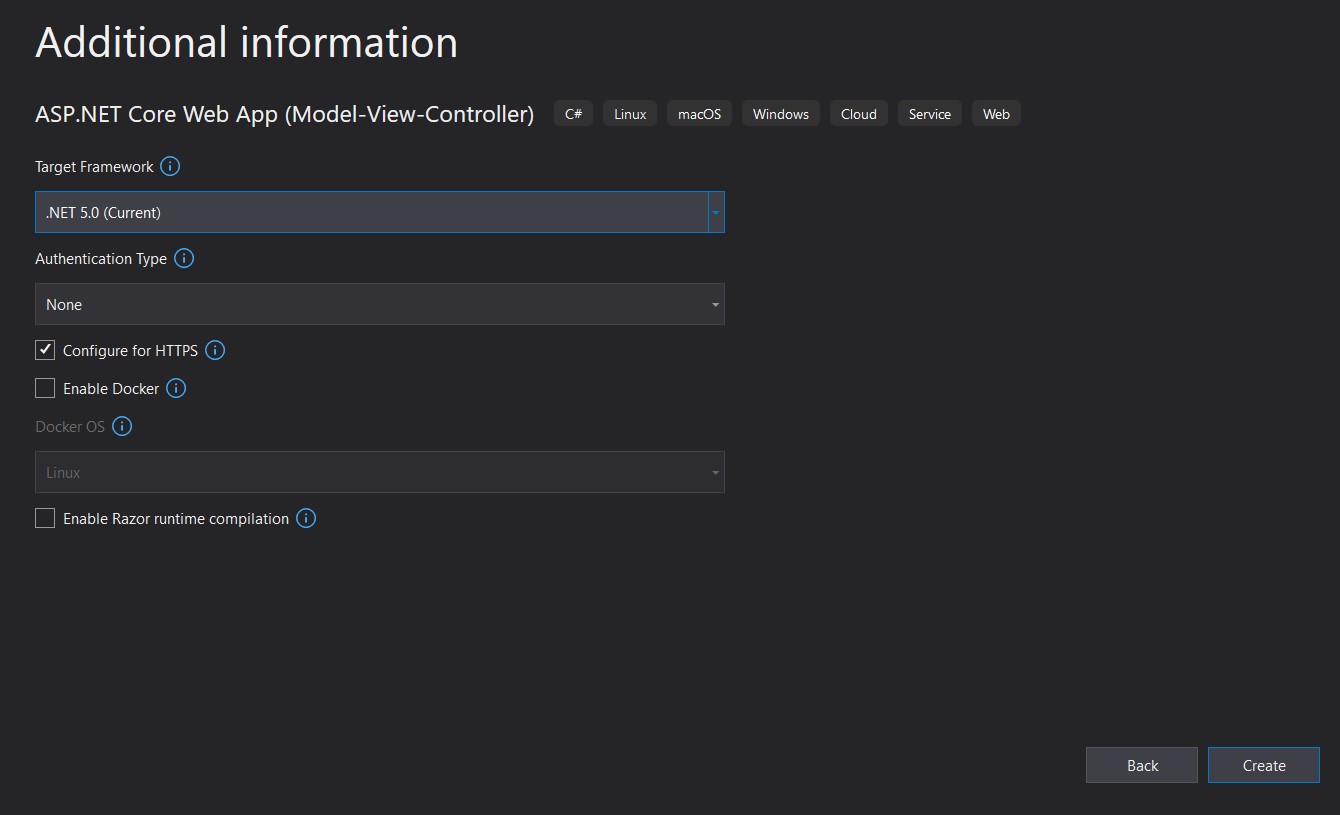
- Leave the defaults in the additional info dialog as shown below with > .NET 5.0 (current), Authentication Type:none, checkbox selected for Configure for HTTPS and everything else unchecked.
Explore Startup.cs
Once the solution loads, find the Startup.cs file and open it. Inside you will find a number of items already configured. An important one for our use case is the IConfiguration Configuration property.
    public class Startup
    {
        public Startup(IConfiguration configuration)
        {
            Configuration = configuration;
        }

        public IConfiguration Configuration { get; }

        // This method gets called by the runtime. Use this method to add services to the container.
        public void ConfigureServices(IServiceCollection services)
        {
            services.AddControllersWithViews();
        }
    ...
In the Startup class constructor, the IConfiguration configuration parameter is provided to us by the dependency injection system using constructor injection and assigned to the Configuration property for later use.
For our sample app, let's create a variable to store a passkey that we could use to, for example, encrypt a string.
        // This method gets called by the runtime. Use this method to add services to the container.
        public void ConfigureServices(IServiceCollection services)
        {
            services.AddControllersWithViews();
            string Passkey = "Pard0nMyDu5t";
            Console.WriteLine($"passkey: {Passkey}");
        }
I have added two lines of code inside the Configure Services method just below the AddControllersWithViews() line.
In this example, I have hard coded the actual key into the variable Passkey. If you run the application,

you will see this passkey value displayed on the console.

There are several problems with this example. First, hard coding the value makes it difficult to change or rotate the key without re-compiling the application and re-deploying. Second, this value will get checked into source control where anyone with access to the source can see it. Not much of a secret.
In the next section, we will solve the first problem of moving the value from hard coded into an external configuration file.
App settings in external config file
In ASP.NET Core projects, a developer can choose to store configuration values in an external file such as the appsettings.json file.
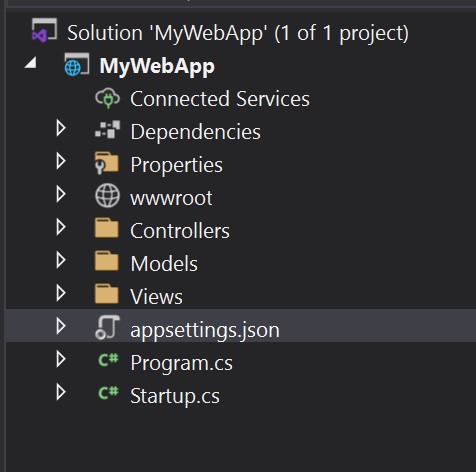
In our project, using the solution explorer view, locate the existing appsettings.json file and open it.
{
  "Logging": {
    "LogLevel": {
      "Default": "Information",
      "Microsoft": "Warning",
      "Microsoft.Hosting.Lifetime": "Information"
    }
  },
  "AllowedHosts": "*"
}
You will see a json structure in this file. It currently contains 2 configuration properties Logging and AllowedHosts.
First, lets add a simple key value pair in the appsettings.json file "Passkey": "Pard0nMyDu5t" so the json file looks like this:
{
  "Logging": {
    "LogLevel": {
      "Default": "Information",
      "Microsoft": "Warning",
      "Microsoft.Hosting.Lifetime": "Information"
    }
  },
  "AllowedHosts": "*",
  "Passkey": "Pard0nMyDu5t"
}
Next we will remove the hard coded value from the Startup.cs file and replace it with code to get the config value from the Configuration object. This code will pull the value in from the appsettings.json file: string Passkey = Configuration["Passkey"];.
// This method gets called by the runtime. Use this method to add services to the container.
public void ConfigureServices(IServiceCollection services)
{
    services.AddControllersWithViews();
    string Passkey = Configuration["Passkey"];
    Console.WriteLine($"passkey: {Passkey}");
}
Now if we run the project again, we will see the same result as before, but the value is no longer hard coded in our application code and lives in an external file.
Nested Settings
In the previous section, we placed a simple setting key in our json file. You can group or nest settings under a common section use json object structure like this:
{
  "Logging": {
    "LogLevel": {
      "Default": "Information",
      "Microsoft": "Warning",
      "Microsoft.Hosting.Lifetime": "Information"
    }
  },
  "AllowedHosts": "*",
  "MySettingsGroup": {
    "Passkey": "Pard0nMyDu5t",
    "OtherSetting":"RandomValue"
  }
}
Notice how "Passkey" is nested under "MySettingsGroup". To access this in your configuration, separate the key nesting with a colon like this:
...
string Passkey = Configuration["MySettingsGroup:Passkey"];
...
For the remainder of this post, we will continue to use a simple key structure and not a nested structure.
User Secrets file
So, it is good that we have moved the value into an external json configuration file, but this file lives within our solution folder and will get checked in with our code. It is a good idea to avoid checking in secrets into your repository.
To solve this problem, ASP.NET Core provides a way to store the secrets in a file that lives on your development machine but outside of your solution folder so it isn't managed by source control.
Add from Visual Studio
In Visual Studio, the easiest way to set this up is to right click on the project and find the menu item: Manage User Secrets.
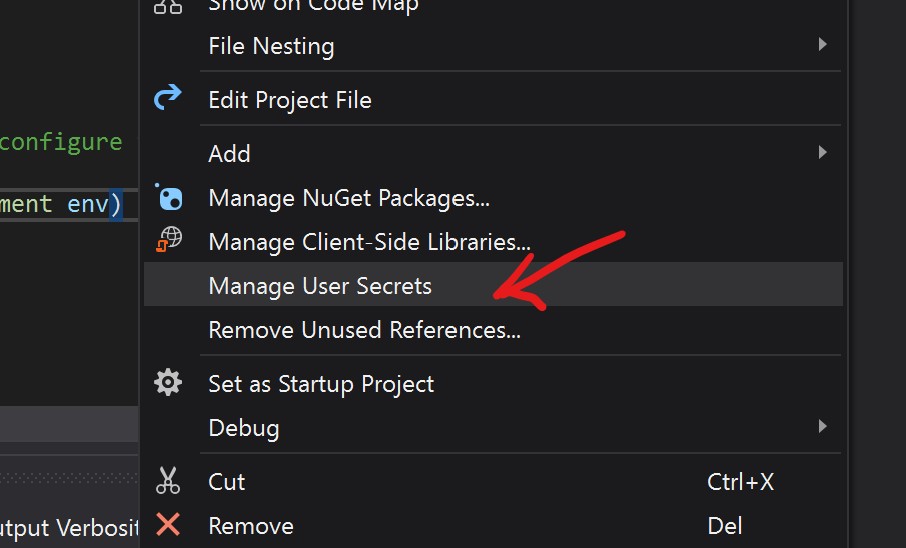
This will create a new empty configuration file called secrets.json that is external to the solution but attached to the project for development purposes.
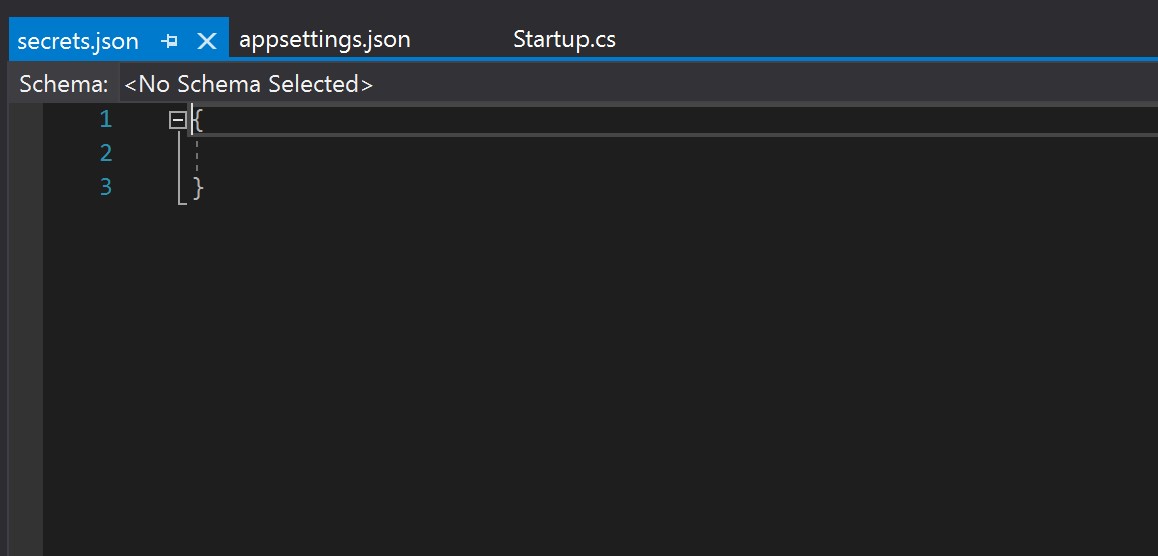
Let's move our key value pair secret from appsettings.json into our secrets.json file instead. Remove "Passkey": "Pard0nMyDu5t" from appsettings.json and into secrets.json.
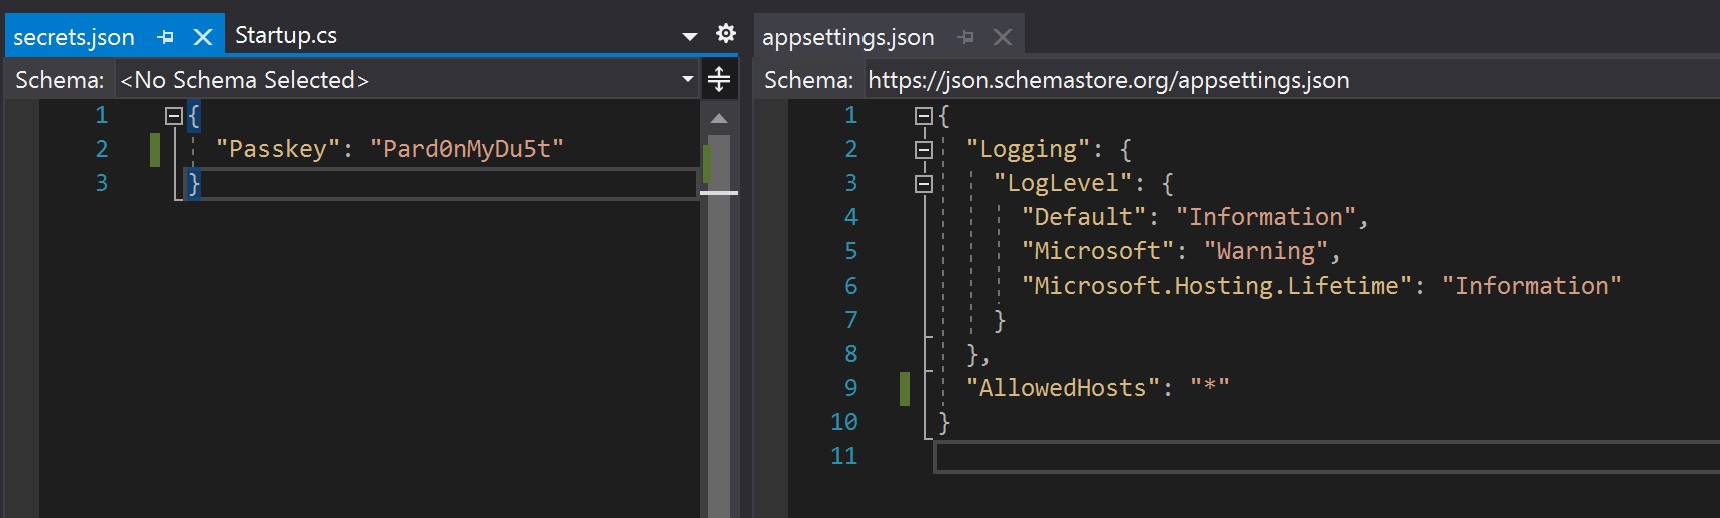
Then run the program again and see that it still works.
Add from command line
If you are on Linux or on a Mac or even if you are using VS Code on a PC, the "manage user secrets" menu item doesn't exist. You can add and manage user secrets from the command line.
Make sure you are in your project path in a terminal window or command prompt.
// to setup a project and attach it to a secrets.json file
dotnet user-secrets init

// to get a list of user-secrets for your project
dotnet user-secrets list

// to add a user-secret
dotnet user-secrets set "Passkey" "Sup3rS3cr3t"

// to remove a secret
dotnet user-secrets remove "Passkey"
Where is the file located?
So the question you may be asking yourself is where is this file actually located?
To find out, hover over the secrets.json tab and you will see the full path to the file.

From theimage you will see that it is located in C:\Users\{user}\AppData\Roaming\Microsoft\UserSecrets\7ad9d3cc-65f2-49cf-b672-fcb3dd7930b5\secrets.json
So, Microsoft has a folder called UserSecrets where all the secrets are stored on your machine. For each project you add, it generates a random GUID for a subfolder name in which it places a secrets.json file.
So the next question you might ask is "how does our project know to look in that particular subfolder with the GUID"?
To discover how this gets connected, right click on your project and select the Edit Project File menu option.
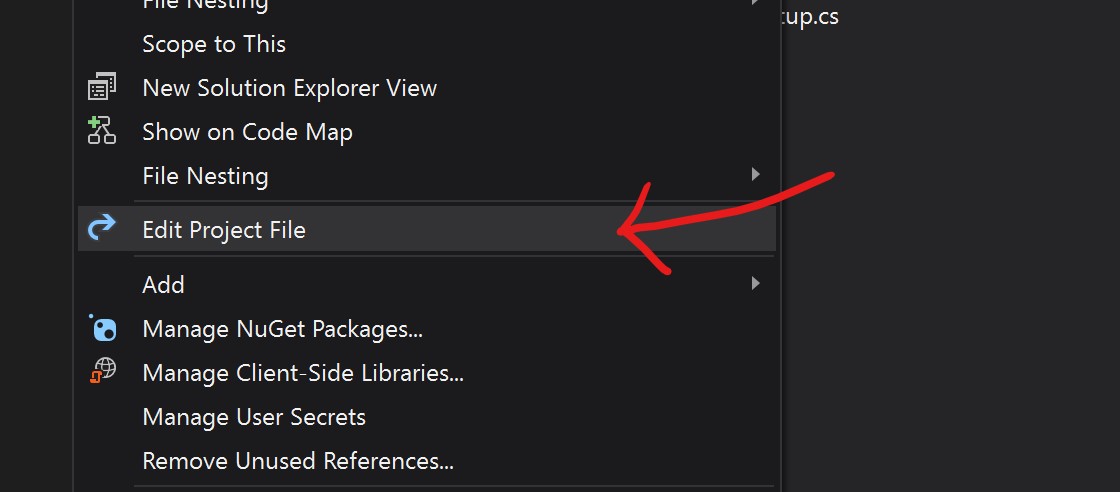
This will open a new tab with a name MyWebApp.csproj with the following information inside:
<Project Sdk="Microsoft.NET.Sdk.Web">

  <PropertyGroup>
    <TargetFramework>net5.0</TargetFramework>
    <UserSecretsId>7ad9d3cc-65f2-49cf-b672-fcb3dd7930b5</UserSecretsId>
  </PropertyGroup>

</Project>
Notice the XML node called <UserSecretsId>? This is how the project knows where to find the secrets.json file located outside of the project in the predetermined location.
Deployment Configuration
So we have now accomplished moving hard coded secrets out of our code and into an external file, and then into an external file that lives outside of our project for development so those secrets will never get checked into source control. But what happens when we try to deploy our application? Where should our secrets live?
There are mutiple options for setting configuration values on the server and it depends upon what type of server you are deploying to.
Environment Variables
First lets discuss what a Windows Server VM might look like and where the configuration values should be placed. One of the easiest places to put configuration values is in Environment Variables on the server.
From an administrator command prompt you can use the setx command to see current Environment Variables. To assign a configuration value such as our passkey, you would run the setx command like this:
setx Passkey Pard0nMyDu5t /M
If you need to remove a value, unfortunately the setx command doesn't support a delete option. Instead, use the REG delete command like this:
REG delete "HKLM\SYSTEM\CurrentControlSet\Control\Session Manager\Environment" /F /V Passkey
After setting the environment variable, you will need to restart the application. If you are testing this on a dev machine, you will need to restart Visual Studio to access the updated environment variable.
To set Environment Variables from a UI, search for Environment Variables in Windows search:
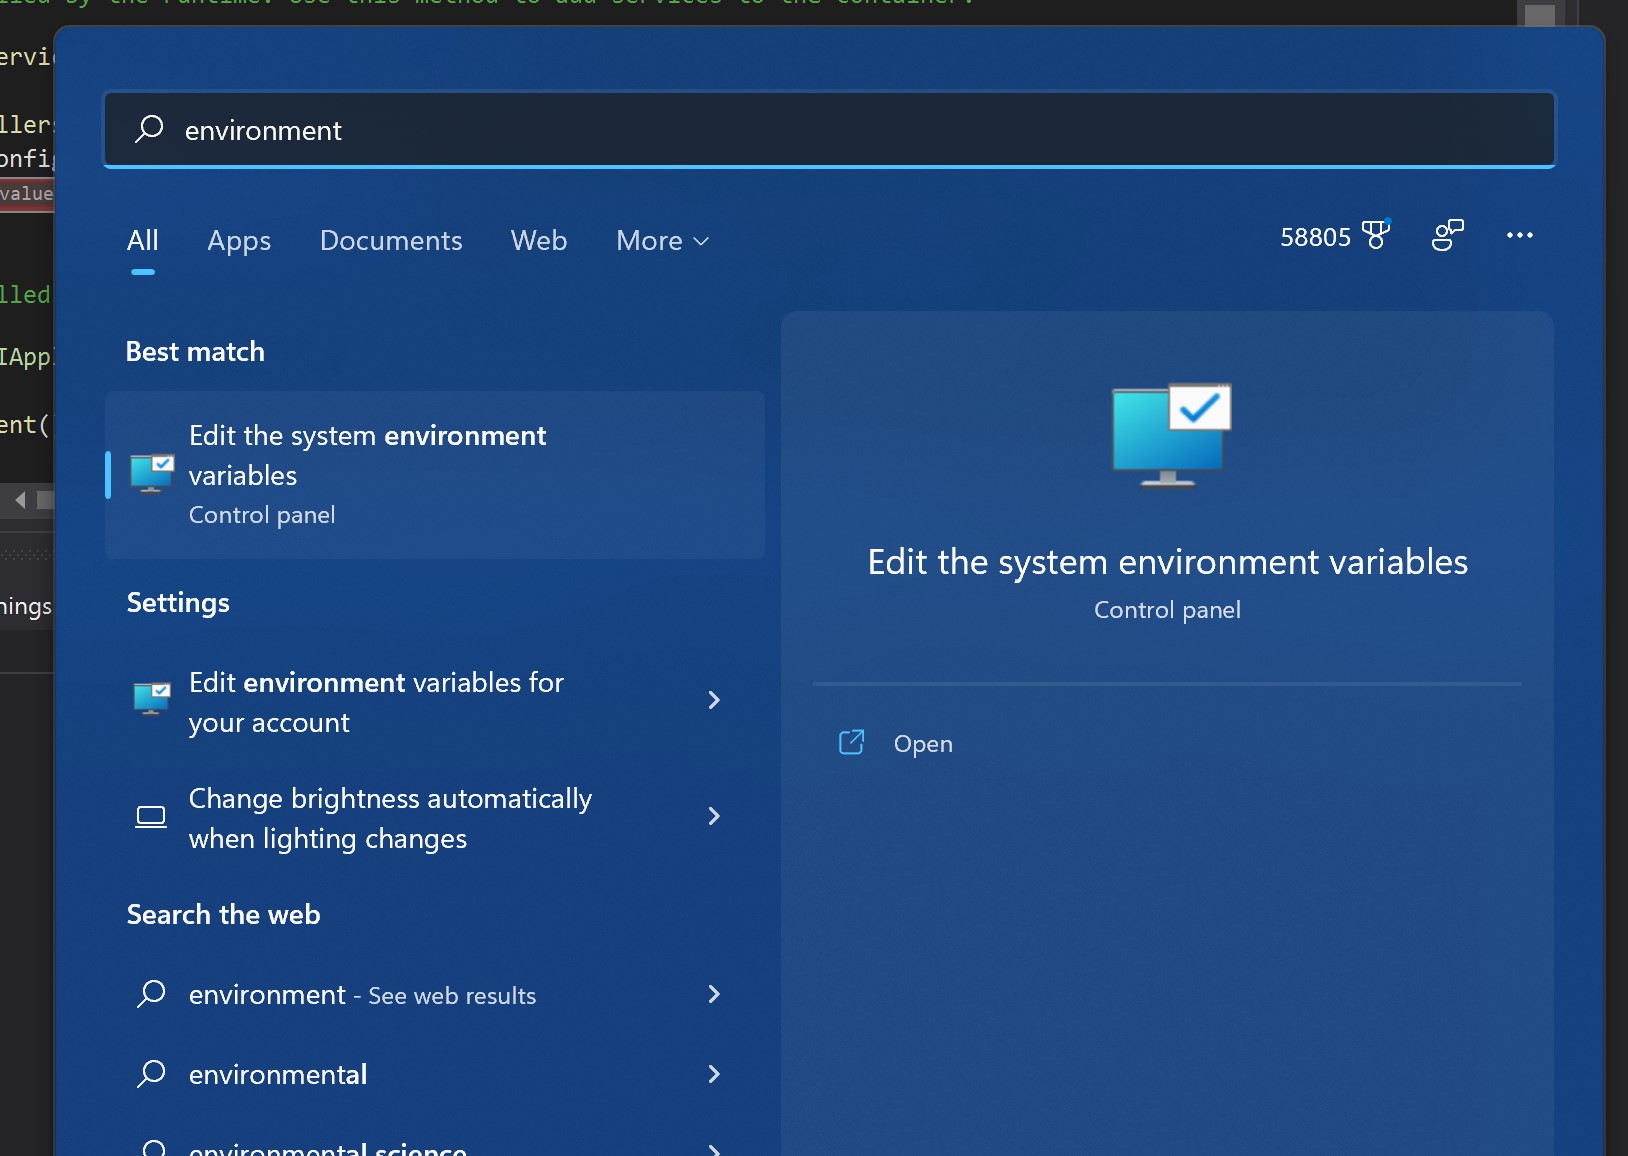
Click on the Control Panel item in the search results to launch.
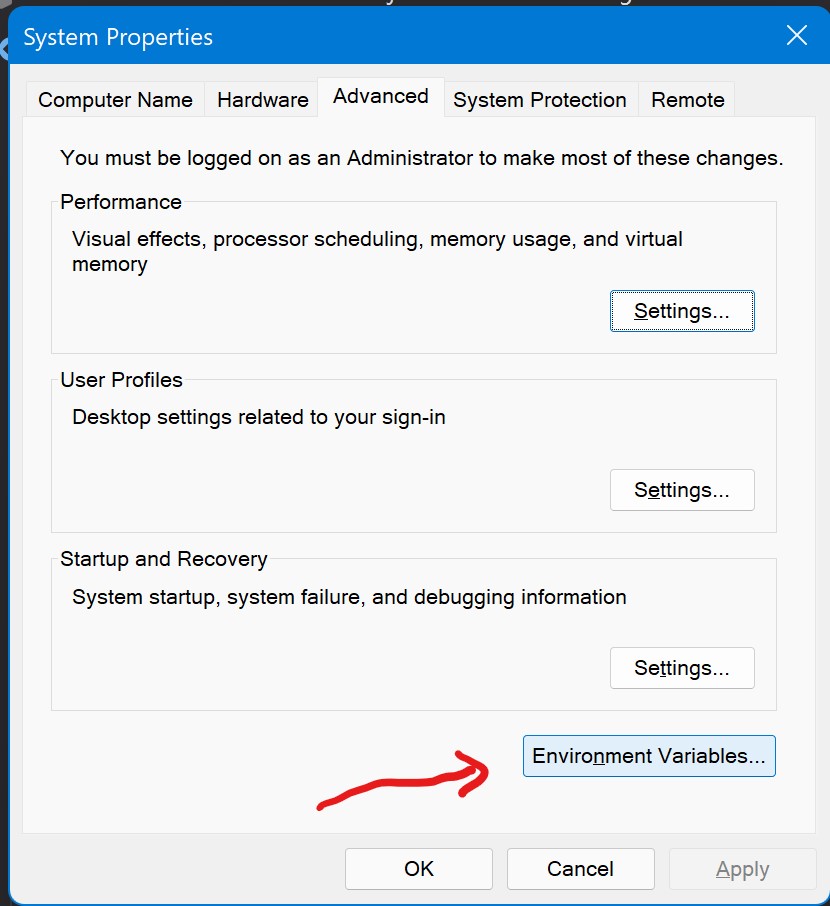
Next, click the Environment Variables button.
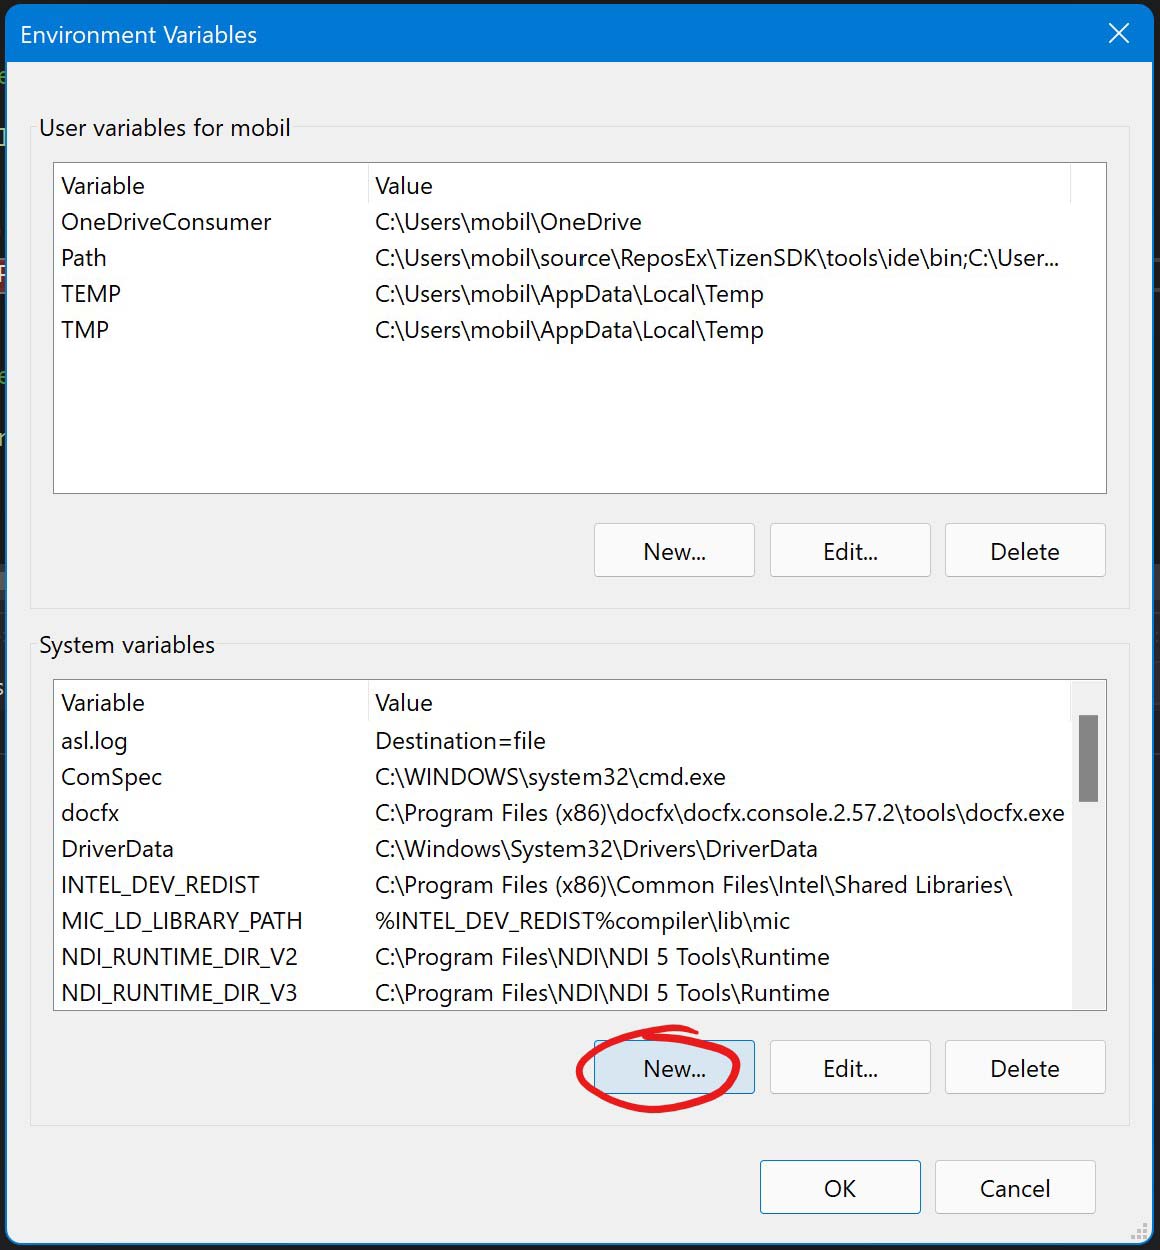
On the Environment Variables dialog screen, click the New button to add a new variable.
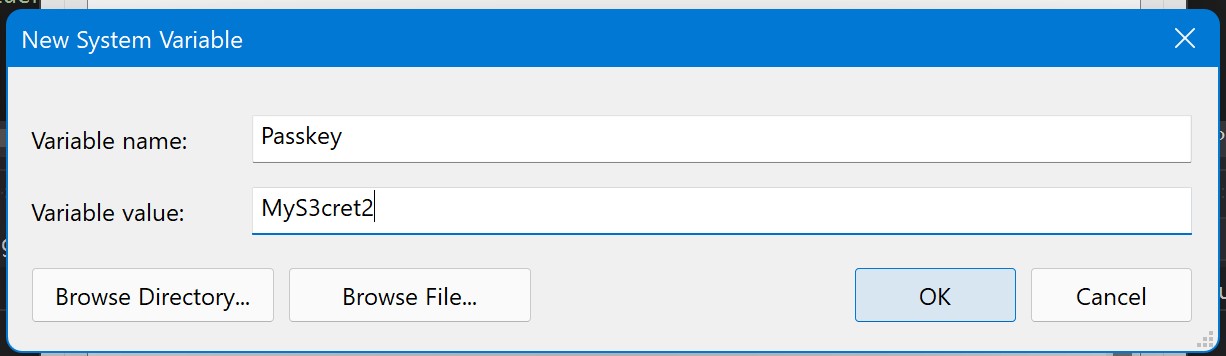
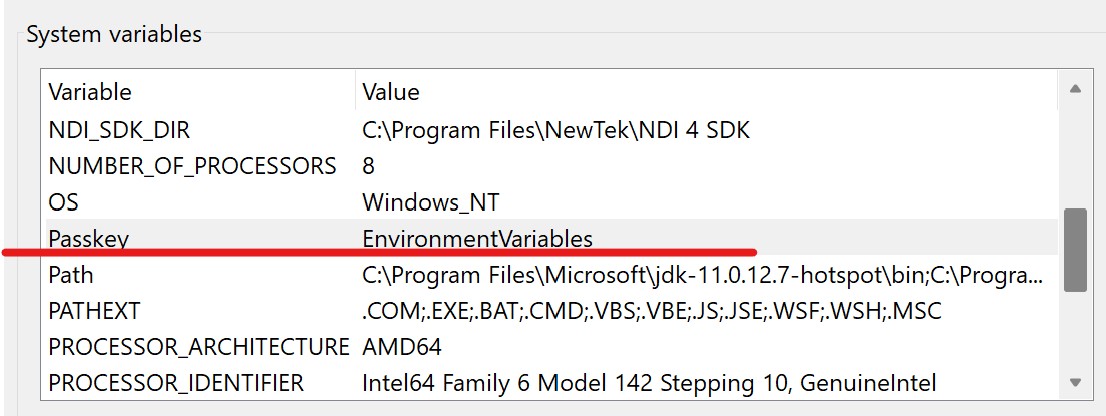
Enter a variable name and value in the dialog and click ok.
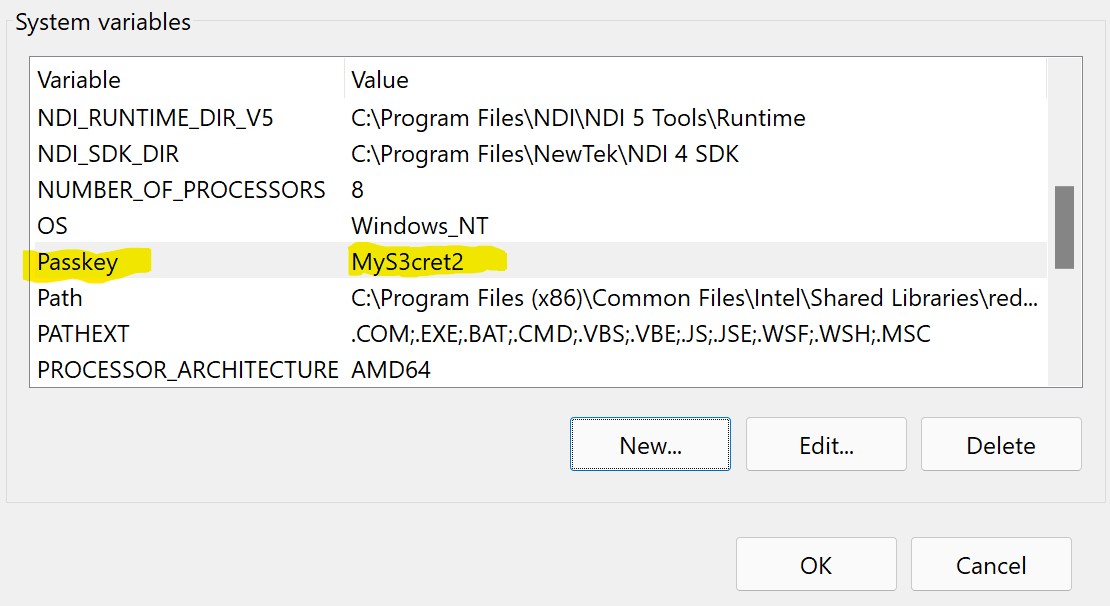
You will find a new value in the System variables list.
Again, to make it visible in Visual Studio, you will need to restart the IDE.
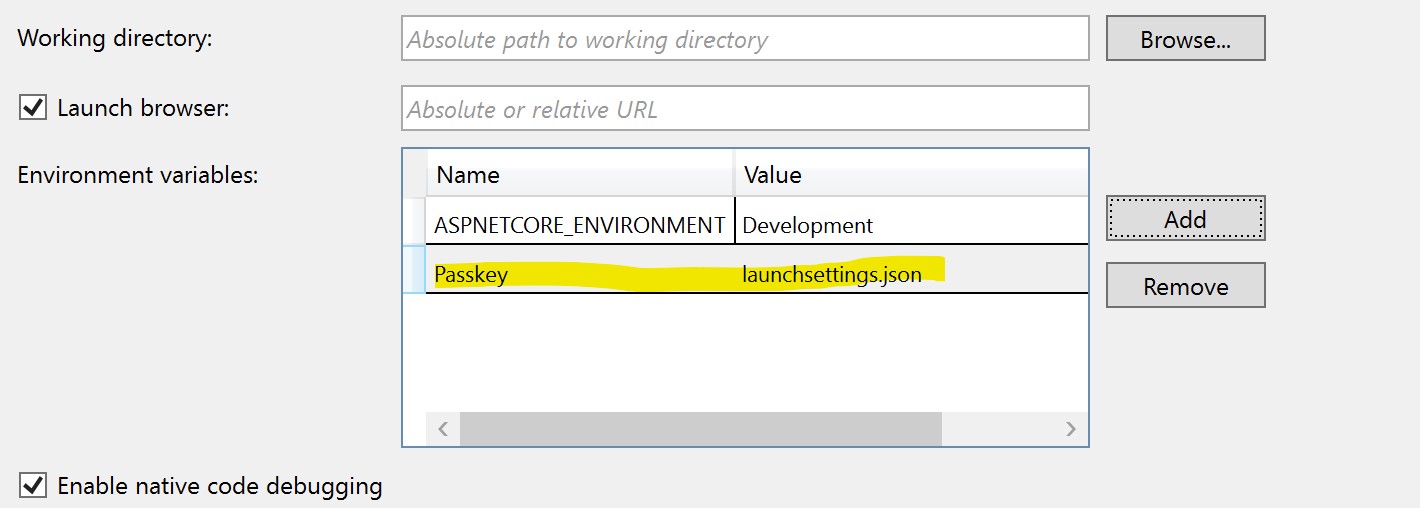
Development only environment variables can be simulated by using the launchsettings.json file. Using these "environment variables" does not require you to restart the IDE and does not live on your machine but will be checked in with code, so use this feature cautiously. This can be accessed directly in the launchsettings.json file or via the properties window for the .csproj file. Right click the project in solution explorer and select properties to open the dialog box, then select the
debugoption in the left-side menu.
The launchsettings.json version of "environment variables" we take precedence over actual environment variables on your local dev machine, so be aware.
You can find the launchsettings.json file buried in your properties folder of the solution explorer. When you open it, there will be a section for your current run configuration. Here is mine:
"MyWebApp": {
  "commandName": "Project",
  "launchBrowser": true,
  "environmentVariables": {
    "Passkey": "launchsettings.json",
    "ASPNETCORE_ENVIRONMENT": "Development"
  },
  "dotnetRunMessages": "true",
  "applicationUrl": "https://localhost:5001;http://localhost:5000"
}
If you notice, the "environmentVariables" section now contains my "Passkey" configuration value.
Azure Configuration Variables
Configuration values can be stored in variables in the Azure portal. For the sake of this article, we won't go into detail but leave it for another post.
Azure Key Vault
Azure Key Vault is a great way to store configuration values in a secure way in the Azure environment. We will have a seperate article to cover Azure Key Vault.
Examining key precedence with multiple configuration files
So what if our "Passkey" variable was defined in "Environment Variables", "secrets.json" and "appsettings.json". Which would "win"?
To find out, let's do a little experiment. First, add this entry to appsettings.json "Passkey":"appsettings.json" so it looks like this:
{
  "Logging": {
    "LogLevel": {
      "Default": "Information",
      "Microsoft": "Warning",
      "Microsoft.Hosting.Lifetime": "Information"
    }
  },
  "AllowedHosts": "*",
  "Passkey": "appsettings.json"
}
Then in the user secrets secrets.json file add this:
{
  "Passkey": "secrets.json"
}
Finally, make an entry in environment variables using the steps in a previous section so it looks like this:
Important! You may need to restart visual studio in order to pickup the newly added or edited environment variable.
Set a breakpoint in Startup.cs just after this line: string Passkey = Configuration["Passkey"];. For me, it is line 29.
Then run the application in debug mode by pressing F5 or by clicking the run button.
When the application starts up and hits the break point, hover over the var Passkey variable and inspect the value. The value reads "EnvironmentVariables" for me.
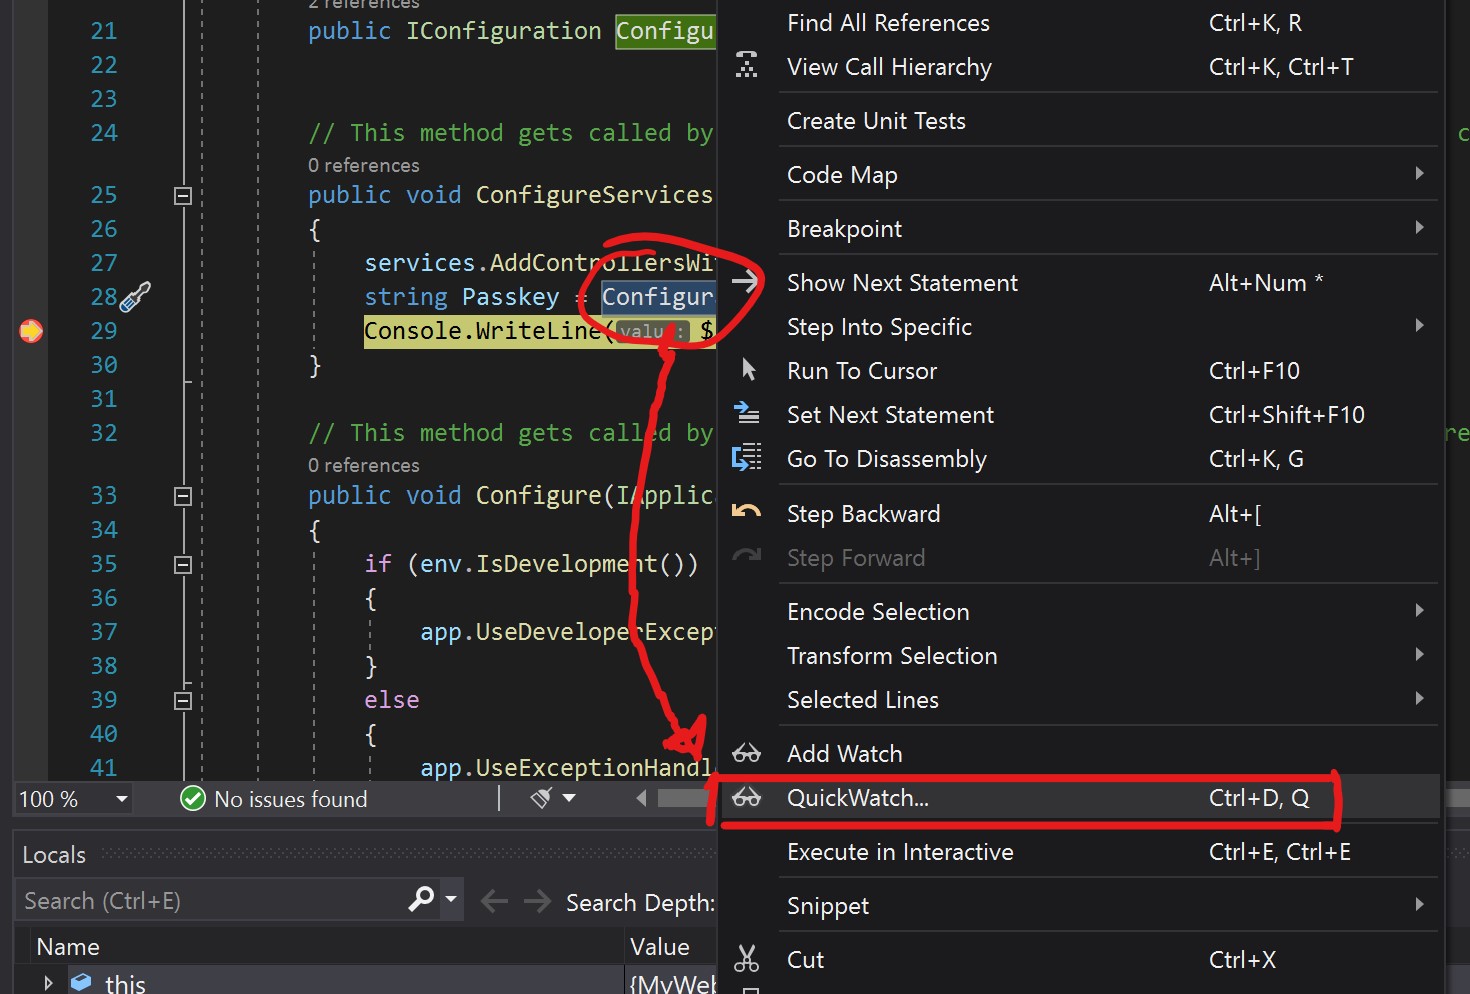
Now add a quickwatch for the Configuration property by selecting the keyword and right clicking to get the context menu (or Ctrl+D, Q for the keyboard shortcut) and selecting QuickWatch...
And then expand to show a list of "Providers"
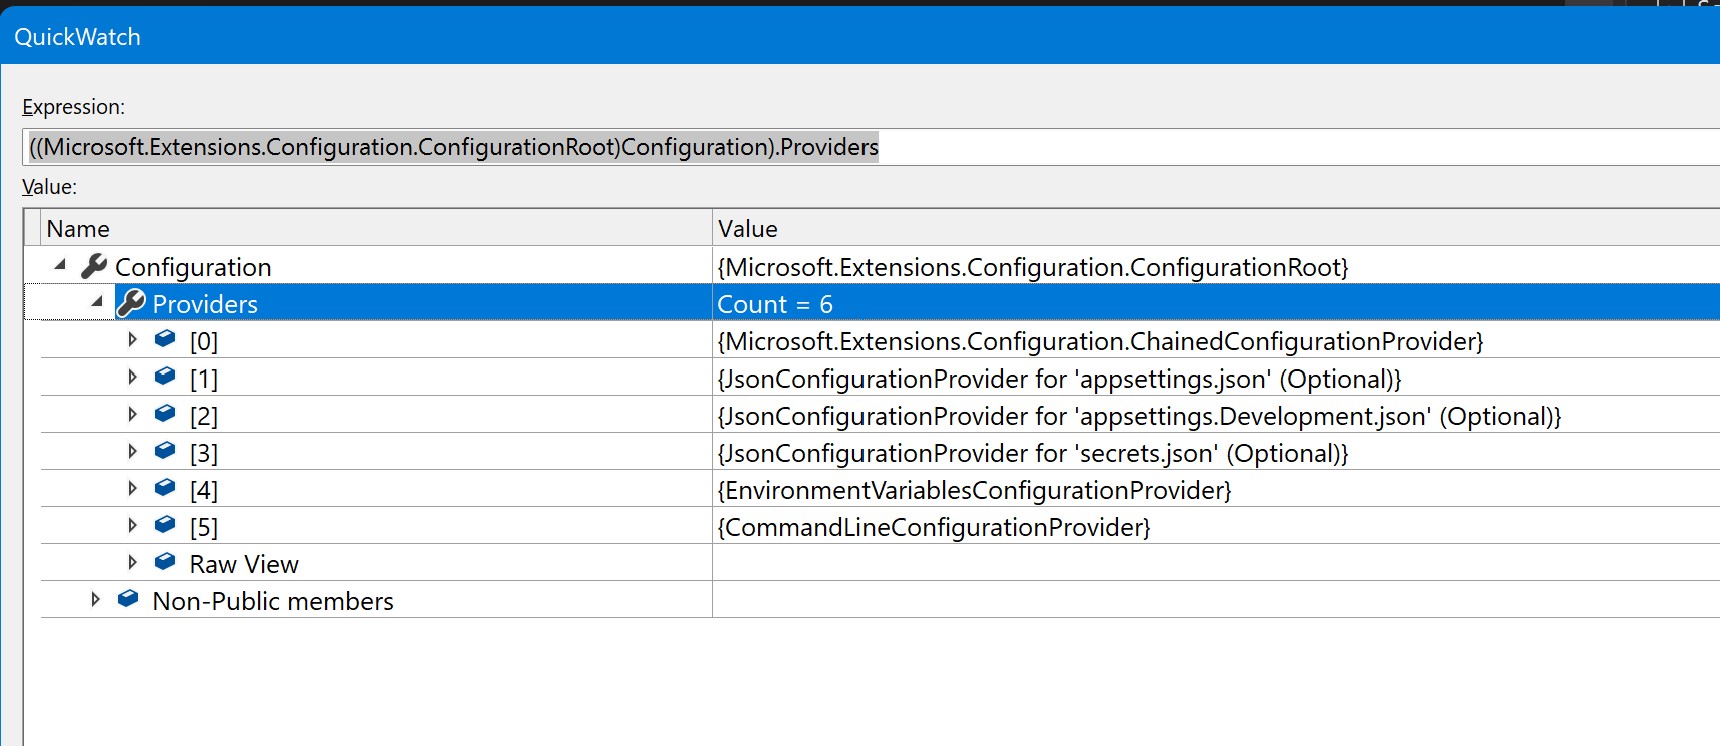
In this list I have 6 different providers. They have been added starting at 0 and ending at index of 5. The last in the chain "wins" when there are multiple values for a key entry. In our case, EnvironmentVariablesConfigurationProvider is the last, so it is the key that "wins".
To understand how this order was decided, we need to look in the Program.cs file in our project. There you will find the following code:
public static void Main(string[] args)
{
    CreateHostBuilder(args).Build().Run();
}

public static IHostBuilder CreateHostBuilder(string[] args) =>
    Host.CreateDefaultBuilder(args)
        .ConfigureWebHostDefaults(webBuilder =>
        {
            webBuilder.UseStartup<Startup>();
        });
In particular, we are intereseted in the "CreateDefaultBuilder(args)". Somewhere in this code, all the default providers have been added automatically (including usersecrets, IF in Development mode) and in the order of specificity shown in the QuickWatch window.
This can be overriden by registering the providers yourself manually, such as in this instance where only the usersecrets provider is added:
.ConfigureAppConfiguration((hostContext, builder) =>
{
    // Add other providers for JSON, etc.

    if (hostContext.HostingEnvironment.IsDevelopment())
    {
        builder.AddUserSecrets<Program>();
    }
})
Summary
So in this post, we have discovered how to keep secrets out of our application code, and out of our settings/configuration files that may get checked into source control and learned how to place them in a secrets.json file outside of the project structure.
In our next post, we will look at Azure Configuration and Azure Key Vault and how to store and retrieve our values from those offerings.